
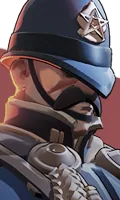
Playing Venator against Warden
Everything below is generated for Deadlock patch 09-16-2026 from Warden's current kit, a kit-based model and a mechanics rule base. Each line carries its own confidence label.
Quick summary
- Threat
- Moderate threat
- Main problem
- Binding Word makes you cover 20 metres in 2.8 seconds or take 110 damage and get immobilised for 1.75-2.5s, and at T3 it silences you for that entire window so you cannot cast the escape ability you were relying on
- Your main advantage
- You kill faster than they do (Venator 2/3 against Warden 1/3).
- Primary rule
- Do not commit before Binding Word is gone. Binding Word first and most importantly — it is the whole hero. Force it out on a mobile teammate who can clear the check, and for 20-34 seconds he has no way to hold anyone still
- Key item
- Unstoppable — Warden gives this team real stuns and hard cc. Buy when enemy lockdown is the reason you lose fights — it lets you walk through a full CC chain and still deal damage.
Strategic No measured result for this specific pairing, so this rating comes from the kit model: 3.6/12 pressure. The largest single factor is dive versus your escape — Warden dive threat 2/3 against your escape 1/3. Derived from trait ratings. Shown because this pairing was not in the harvested win-rate dataset.
What should I do right now?
Before lane
Do
- Plan for Unstoppable — know which tier it sits in so you are not improvising at the shop.
- Know what Binding Word looks like. It is the cooldown this lane revolves around.
Avoid
- Walking to lane on the same path every wave against a hero with Warden's engage range.
During lane
Do
- 6.3 m/s base speed, the slowest in this group, so he cannot rotate to other lanes or escape a collapse
- The 09-16-2026 patch cut Flask's projectile range and speed by 30%, making his safest laning tool much harder to land
- Consecrating Grenade denies the enemy laner's Healing Rite and regen trades in a fixed 1v1 lane where the 4.5m burn is hard to fully avoid
Avoid
- Alchemical Flask's -25% to -50% weapon damage for 7s wins nearly every early weapon trade outright
- 805 base health plus a 125+ Willpower barrier means he survives commits that kill most ranged laners
Mid game
Do
- Their first real spike is Binding Word unlock — respect it from that point, not before.
- Your spike is laning 0-10min: Consecrating Grenade's 30% healing reduction makes him a strong counter-laner against any regen-based opponent
Avoid
- Taking an even fight against Warden on their spike timing when you could take the same fight ten minutes later on yours.
Teamfights
Do
- Watch for Last Stand. Leave the radius. He heals 75% of the damage he does to heroes, so every second you spend inside is health transferred to him — walking out is strictly better than trading
- Bank your Stamina. Entering a fight with Warden at full stamina is the entire counterplay to Binding Word: two dashes plus sprint clears the 20m check comfortably
Avoid
- Spending your own escape before Binding Word is on cooldown.
Abilities to watch
- Last Stand Ultimate
This is the ability that actually kills you — none directly — its power comes from being paired with Binding Word. Everything else in the kit is set up by it.
- Leave the radius. He heals 75% of the damage he does to heroes, so every second you spend inside is health transferred to him — walking out is strictly better than trading
- Before T3, interrupt the 2s charge-up: any stun, knockup or displacement (Viscous's Puddle Punch, Wraith's Telekinesis, Vyper's Petrifying Bola, Venator's Gutshot wall stun) cancels it
- Once he has T3 he is Unstoppable while channelling — CC no longer works, so the only answer is to disengage and re-engage after the 10s window
- Alchemical Flask Ability 1
This is the ability that actually kills you — -16% movement slow for 3s. Everything else in the kit is set up by it.
- Since the 09-16-2026 patch the flask flies 30% slower and 30% shorter — sidestep the visible arc, and simply standing further back often makes it unthrowable
- Spirit-damage heroes (Victor, Yamato, Viscous) largely ignore it, because the debuff hits weapon damage and fire rate, not spirit damage
- Hold your Stamina: T1 drains one charge, so entering the Flask radius with full stamina leaves you enough dashes to clear a following Binding Word
- Binding Word Ability 3
This is the ability that actually kills you — 1.75s immobilise (T2 adds +0.75s, so up to 2.5s) if the target fails the check; T3 also silences them from cast until they either escape or are immobilised. Everything else in the kit is set up by it.
- Run IMMEDIATELY and in a straight line — you need 20m of separation within 2.8s, and hesitating for even half a second is what loses the check
- Hold Stamina specifically for this: two dashes plus sprint clears 20m comfortably, which is why you should not enter Flask range with your stamina already spent
- Once he has T3, the silence means you cannot cast an escape ability during the window — you must clear it with Stamina and raw movement speed alone, so buy movement items rather than relying on Project Mind, Flight or Flying Slash
- Willpower Ability 2
His engage enabler. With the lowest base movement speed in this group, Willpower is the only way he closes the distance to land Flask and Binding Word, and the barrier is what lets him survive the approach.
- Strip the 125+ barrier before committing burst — the barrier is a flat pool, so a cheap ability chunk removes it and your real damage then lands on health
- The duration is only 5-7s; kiting out the window is often better than trading into it
- Even at +35% he is starting from 6.3 m/s, the slowest in this group — a genuinely mobile hero (Yamato at 8.2, Vindicta at 7.9, Vyper sliding) still outruns him
Abilities to bait — in this order
- 1. Binding Word
Binding Word first and most importantly — it is the whole hero. Force it out on a mobile teammate who can clear the check, and for 20-34 seconds he has no way to hold anyone still
- 2. Alchemical Flask
Alchemical Flask second: it is the stamina drain and slow that makes Binding Word land, so eating a Flask on a tank instead of your carry breaks the combo before it starts
- 3. Willpower
Willpower third: it is his only engage and his only barrier. Force him to use it defensively and, pre-T2 (40s cooldown), he cannot reach you at all for the next rotation
Matchup overview
- Their structural weakness: Slowest base movement in this group (6.3 m/s); everything depends on Willpower being available Why this is shown: Warden's weaknesses. Strong evidence
- Their structural weakness: Binding Word is a check, not a guaranteed root — a mobile hero with stamina banked simply walks out of it Why this is shown: Warden's weaknesses. Strong evidence
- Their structural weakness: Nerfed in the 09-16-2026 patch across three lines: Flask projectile range and speed -30%, bullet damage per boon 0.28 to 0.25, and Willpower T3 scaling and debuff resistance both cut Why this is shown: Warden's weaknesses. Strong evidence
- Neither of you can disengage well, so fights between you tend to go to completion. That makes the decision to start one much more important than anything you do inside it — commit only when you already have the advantage, because backing out is not available to either side. Why this is shown: Both heroes have mobility 0-1; low disengage on both sides. Strategic
What they do against you
- Binding Word makes you cover 20 metres in 2.8 seconds or take 110 damage and get immobilised for 1.75-2.5s, and at T3 it silences you for that entire window so you cannot cast the escape ability you were relying on Why this is shown: Authored from Warden's kit. Strong evidence
- Alchemical Flask cuts your weapon damage by 25-50% and your fire rate by 30% for 7 seconds while also draining a Stamina charge — the stamina loss is specifically designed to make the Binding Word check fail Why this is shown: Authored from Warden's kit. Strong evidence
- Last Stand pulses 70-110 DPS twice a second in a 12-16m radius while he heals 75% of that damage back and has 50-80% bullet and spirit resist Why this is shown: Authored from Warden's kit. Strong evidence
- At T3 he is Unstoppable while channelling Last Stand, so stunning him out of it stops working and you must physically leave the area Why this is shown: Authored from Warden's kit. Strong evidence
- The full chain — Flask to drain stamina and slow, Binding Word to root, Last Stand on top — is a scripted kill on any hero without a banked escape Why this is shown: Authored from Warden's kit. Strong evidence
- Warden can silence, which means your escape is only real if it is already active. Pre-empt rather than react: if you are walking into a position where the silence lands, your defensive cooldown should be spent getting out of that position, not saved for after. Why this is shown: Silence prevents ability and item use, invalidating reactive defensive cooldowns. Strong evidence
How you counter them
- Bank your Stamina. Entering a fight with Warden at full stamina is the entire counterplay to Binding Word: two dashes plus sprint clears the 20m check comfortably Why this is shown: Authored counterplay against Warden. Strong evidence
- Avoid the Alchemical Flask arc — since the 09-16-2026 patch it travels 30% slower and 30% shorter, so simply holding further back denies the stamina drain that makes the root land Why this is shown: Authored counterplay against Warden. Strong evidence
- Once Binding Word is cast, run in a straight line immediately, and use verticality (zipline, mantle, a ledge drop) which covers 20m faster than ground movement Why this is shown: Authored counterplay against Warden. Strong evidence
- Do not fight inside Last Stand's 12-16m radius; he lifesteals 75% off heroes, so trading into it heals him. Walk out and re-engage after the 6-10s channel Why this is shown: Authored counterplay against Warden. Strong evidence
- Bring spirit damage: Flask's debuff only touches weapon damage and fire rate, so Victor, Yamato and Viscous are barely affected by his signature anti-carry tool Why this is shown: Authored counterplay against Warden. Strong evidence
- Outrun him — at 6.3 m/s he is the slowest in this group, and once Willpower's 5-7s window expires he cannot chase anyone Why this is shown: Authored counterplay against Warden. Strong evidence
- You do not have the CC to reliably break Last Stand out of your own kit, so buy the cheapest thing that does: Silence Wave is the only area silence in the shop and the standard answer to channelled ultimates. Area matters because you do not have to win the aim duel — you have to cover the spot they cast from. Note the alternative, Counterspell, parries a single ability outright but requires a read; Silence Wave forgives a bad read, which is why it is the buy when interrupting is not your specialty. Why this is shown: Silence Wave (T3 Spirit) is the only area silence; Counterspell negates a single ability but requires prediction. Strong evidence
- You cannot out-move Warden's gun, so the answer is the item that changes what their bullets do rather than where you stand. Plated Armor deflects bullets outright and — the part most players miss — strips their on-hit build-ups, which is the only clean answer to Silencer, Toxic Bullets and Inhibitor stacks landing on you. If 6,400 is too far away, Battle Vest at +18% Bullet Resist is the efficient Tier II step and Bullet Resilience at +30% (with a further +15% below half health) the Tier III one. Why this is shown: Plated Armor deflects bullets and strips on-hit build-ups; Battle Vest +18% and Bullet Resilience +30% are the T2/T3 stat steps. Strong evidence
Trading
- The 2-second Last Stand charge-up, before he has T3 — any stun, knockup or displacement cancels the whole ultimate Why this is shown: Warden's vulnerability windows. Strong evidence
- The 20-34s after Binding Word is spent: he has no hard CC and is a slow, short-range bruiser Why this is shown: Warden's vulnerability windows. Strong evidence
- The 16-40s after Willpower expires — at 6.3 m/s with no barrier he cannot initiate or retreat Why this is shown: Warden's vulnerability windows. Strong evidence
- Any fight at range beyond his rifle's ~18m falloff start, where his abilities cannot reach and his weapon damage collapses Why this is shown: Warden's vulnerability windows. Strong evidence
- Immediately after a whiffed Alchemical Flask (post-09-16-2026 the projectile is 30% slower, so whiffs are more common) — the Binding Word that follows is much easier to escape Why this is shown: Warden's vulnerability windows. Strong evidence
- When Warden puts up a barrier, do not reset the trade and wait for it to drop. Overflow damage carries through to health, so a single large hit spends the barrier and keeps going in one action — there is no wasted remainder. What does get wasted is chip, because barriers decay on their own and small hits are exactly what a temporary pool absorbs for free. Either commit your burst through it or disengage entirely; the middle option gives them a free absorb. Why this is shown: Barriers sit in front of health with overflow carrying through, and decay over time. Strong evidence
Laning
- What they want in lane: Alchemical Flask's -25% to -50% weapon damage for 7s wins nearly every early weapon trade outright Why this is shown: Warden's laning strengths. Strong evidence
- What they want in lane: 805 base health plus a 125+ Willpower barrier means he survives commits that kill most ranged laners Why this is shown: Warden's laning strengths. Strong evidence
- What you can take from them in lane: 6.3 m/s base speed, the slowest in this group, so he cannot rotate to other lanes or escape a collapse Why this is shown: Warden's laning weaknesses. Strong evidence
- What you can take from them in lane: The 09-16-2026 patch cut Flask's projectile range and speed by 30%, making his safest laning tool much harder to land Why this is shown: Warden's laning weaknesses. Strong evidence
- Your lever: Consecrating Grenade denies the enemy laner's Healing Rite and regen trades in a fixed 1v1 lane where the 4.5m burn is hard to fully avoid Why this is shown: Venator's laning strengths. Strong evidence
- Confirming and denying a soul orb is a hit-check, not a damage-check — one bullet or one pellet takes it regardless of how much damage it does. That is good news for you in the abstract and bad news against Warden specifically, because your projectile has travel time and their hitscan does not. On the contested floating orb you have to pre-fire: start the shot before the trooper dies and lead the orb's spawn point, because if you both react at the same instant they win every time. Why this is shown: Soul confirm/deny resolves on hit rather than damage; projectile travel time versus a hitscan opponent. Strong evidence
Mid game
- Their spike — Binding Word unlock: A conditional 1.75s root on a 34s cooldown is his first real kill threat Why this is shown: Warden's power spike timeline. Strong evidence
- Their spike — ult unlock: Last Stand plus Binding Word becomes a guaranteed kill combo on any target that fails the escape check Why this is shown: Warden's power spike timeline. Strong evidence
- Their spike — Alchemical Flask T2 (-50% weapon damage): He becomes a hard counter to bullet carries, halving their output for 7 seconds at a time Why this is shown: Warden's power spike timeline. Strong evidence
- Their spike — Binding Word T3 + Last Stand T3: The silence on the escape check plus Unstoppable while channelling removes both normal counterplays at once — this is his peak Why this is shown: Warden's power spike timeline. Strong evidence
- Your spike — laning 0-10min: Consecrating Grenade's 30% healing reduction makes him a strong counter-laner against any regen-based opponent Why this is shown: Venator's power spike timeline. Strong evidence
- Your spike — Hex-Lined Snap Trap T2 (+1s immobilize): A 2.25s root is long enough to chain a full Gutshot plus weapon burst without help Why this is shown: Venator's power spike timeline. Strong evidence
- The first Unstable Rift lands around 11:00 and then every 7 minutes, and Warden beats you in exactly the fight it creates. Use the telegraph: a world-only visual appears on a random side-lane bridge roughly 60 seconds before the global announcement and map marker, which is the single biggest piece of free information in the mid game. Spend those 60 seconds either grouping or deliberately taking something elsewhere — the one thing you cannot afford is arriving at a Rift bridge late and alone. Why this is shown: First Unstable Rift ~11:00 (±1 min) then every 7 minutes; ~60s world-visual warning precedes the global announcement. Strong evidence
- There is a hard behavioural change at 20:00 in this matchup: respawn goes from 35 to 38 seconds as of 09-16-2026, and you are the hero Warden can pick off without a fight starting. Three seconds does not sound like much until you price it against the Rift's 7-minute cadence and the Urn at 20 and 25 — a single death now reliably costs you presence at the next objective. Past 20:00, stop taking the solo camp that is one rotation from their side of the map. Why this is shown: 09-16-2026: respawn timer at 20:00 raised 35s → 38s; hero has escape 0-1 against enemy diveThreat 2+. Verified
Teamfights
- Last Stand is a channel, which means the fight is decided by whether you can break it. Hold one interrupt — a stun, a silence, or a displacement — specifically for that cast rather than spending it on the opening trade. If you have no interrupt, the answer is line of sight: leave the area entirely rather than trying to out-heal it. Why this is shown: Channelled ultimates are interruptible by hard CC, silence or displacement. Strong evidence
- Warden brings enough lockdown that stun sequencing matters. Community reporting describes stun diminishing returns of roughly 10% then 30% inside an 8-second window, applying to stuns only and not to silences, slows, disarms or hexes — so their follow-up chain may be shorter than the first one felt. Treat this as unconfirmed, but it is worth knowing before you burn a cleanse on the opening stun. Why this is shown: Stun diminishing returns reported by community sources; not confirmed in official notes. Uncertain
Positioning
- Warden wins by choosing where the fight happens. Take your position before the zoning goes down, not after — once the area is committed you are fighting on their terms, and walking in to contest it is exactly the mistake the kit is built to farm. Why this is shown: Zone-control kits convert space into damage; positioning must precede the cast. Strategic
Build adjustments
- Warden heals through damage, so healing reduction is not optional here — but pick the right application route. Anti-heal arrives two ways: bullet-applied (Toxic Bullets, T3) builds up through gunfire, and spirit-applied (Healbane, T2) lands off spirit damage. Buy the one that matches how you actually deal damage, or it will never apply. Why this is shown: Anti-heal application routes differ by damage type; mechanics research, patch 09-16-2026. Verified
- Against Warden's crowd control, understand what Debuff Resist actually buys you: it shortens duration, never magnitude. It is excellent against long disables and close to worthless against a short hard slow. Two things it explicitly does not shorten at all are the parry stun and the Knockdown item's stun. Why this is shown: Debuff Resist reduces duration only; parry stun and Knockdown stun are documented exclusions. Verified
- Unstoppable (vitality T4) — Warden gives this team real stuns and hard cc. Buy when enemy lockdown is the reason you lose fights — it lets you walk through a full CC chain and still deal damage. Why this is shown: Answers: enemy-hard-cc, enemy-silence, enemy-channeled-ult. Verified
- Debuff Reducer (vitality T2) — Warden gives this team real stuns and hard cc. The standard early buy when the enemy team chains crowd control; it is also the component for Spellbreaker and Unstoppable. Why this is shown: Answers: enemy-hard-cc, enemy-silence, enemy-slow. Verified
- Dispel Magic (vitality T3) — Warden gives this team real silences and ability denial. Buy when enemy debuffs — slows, silences, anti-heal, disarms, hexes — are what is killing you rather than raw damage. Why this is shown: Answers: enemy-silence, enemy-zone-control, enemy-slow. Verified
Common mistakes
- The losing pattern against Warden is deciding to leave, walking to the zipline and finding you cannot attach. Any damage from an enemy hero or objective blocks zipline attachment for 3 seconds, and Warden has the chip range to keep that 3-second timer rolling indefinitely. Break line of sight first, wait out the lockout, then attach — do not walk to the rope while still taking fire. Why this is shown: Zipline attachment is blocked for 3s after taking enemy hero or objective damage; enemy rangedPoke 2+. Verified
- Players buy Dispel Magic for Warden and then discover it does nothing about Last Stand. Dispel Magic purges non-ultimate negative effects only — anything sourced from an ultimate is outside its scope entirely. Work out which of Warden's disables come off abilities and which come off the ult before you spend 3,200: the ability-sourced ones are purgeable, the ult is not, and for the ult you need either Unstoppable pre-cast or the discipline not to be there. Why this is shown: Dispel Magic cannot purge ultimate-sourced debuffs; enemy cc 3 with a hard disable tag. Verified
- The specific error is walking into Warden's area denial after it is already down, because your team is in there and you feel late. You are slow enough that entering a committed zone is a one-way decision — you will be inside it for its full duration, not for the two seconds you intended. Arrive before the zone or arrive from the other side of it; arriving into it is how this matchup is lost even when your team wins the fight. Why this is shown: Enemy zone-control against a hero with mobility 0-1; committed entry cannot be aborted. Strategic
- The Unstable Rift capture point is a 20m circle on a bridge, capture only progresses when no enemy is inside it, and everyone standing in it is revealed on the minimap. That is a purpose-built trap for Warden. The mistake is treating the circle as the objective: you do not need to stand in it, you need them not to. Contest from outside the radius, deny with a single body at the edge, and let their area damage land on empty bridge. Why this is shown: Unstable Rift: 20m capture radius, progress halts while any enemy is inside, occupants revealed on the minimap. Strategic
Analyse this against your whole enemy team
A single matchup only tells you part of the story — which enemy to actually focus, and what to buy, depends on the other five. Open the tool with this matchup pre-loaded and add the rest.
Open in the matchup toolOther Venator matchups
The other side
Want to know how Warden is supposed to play this?
Sources and method for this page
Warden's kit and counterplay were compiled from 6 sources, cross-checked for patch 09-16-2026. Threat ratings compare this pairing against Venator's own baseline win rate rather than a flat 50%, because ranking by raw win rate produces the wrong answer for heroes whose overall win rate is not 50%.