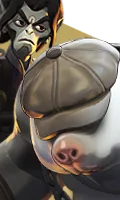

Playing Mo & Krill against Rem
Everything below is generated for Deadlock patch 09-16-2026 from Rem's current kit, measured match results and a mechanics rule base. Each line carries its own confidence label.
Quick summary
- Threat
- Low threat
- Main problem
- Naptime strips your dash distance and locks out every movement ability before the sleep even lands, so once you are in the 19m gaze there is no mechanical out — then your whole group is asleep for the objective
- Your main advantage
- You survive the opening and they cannot (Mo & Krill 3/3 against Rem 0/3).
- Primary rule
- Do not commit before Pillow Toss is gone. Pillow Toss first, always. It is one charge on a 25s (18s at 1 AP) cooldown, it is Rem's only self-peel, and landing it is also what refunds cooldowns on everything else. Feint an approach with a durable body, eat the pillow, then commit for real
- Key item
-
 Unstoppable — Rem gives this team real channelled ultimates. Buy when enemy lockdown is the reason you lose fights — it lets you walk through a full CC chain and still deal damage.
Data-supported Measured: you win 55.1% of these, which is 2.3 points above your overall win rate (26,100 matches). The kit-based model agrees. Ranked against this hero's own baseline win rate, not raw win rate. Source: Deadlock Labs (deadlocklabs.gg/heroes/rem/) (mirrored).
What should I do right now?
Before lane
Do
- Plan for Unstoppable — know which tier it sits in so you are not improvising at the shop.
- Know what Pillow Toss looks like. It is the cooldown this lane revolves around.
Avoid
- Walking to lane on the same path every wave against a hero with Rem's engage range.
During lane
Do
- 680 max health, the lowest in this group and among the lowest in the game — Rem dies to any burst combo that connects
- Zero damage contribution means a lane partner who wants to force kills gets no help doing it
- 930 base health is one of the largest pools in the game and makes them extremely hard to push out of lane.
Avoid
- Tag Along's missing-health burst plus lingering regeneration makes a duo lane extremely hard to burst down, and the heal is strongest exactly at the moment the trade should have been lost
- Pillow Toss knockback denies the enemy's all-in and refunds cooldowns on hit, so a Rem who lands pillows out-tempos the lane
Mid game
Do
- Their first real spike is ult unlock — respect it from that point, not before.
- Your spike is Scorn first two points (laning 0-10min): The Scorn/Scorn opener front-loads their strongest sustain and lets them snowball the lane (66.9% WR per deadlocklabs.gg).
Avoid
- Taking an even fight against Rem on their spike timing when you could take the same fight ten minutes later on yours.
Teamfights
Do
- Watch for Naptime. It is a directional channelled gaze with a 19m radius — the counter is leaving the cone, not hiding, because it goes through walls
- Buy healing reduction early (Healbane / Decay-style anti-heal). Tag Along's missing-health burst is Rem's entire teamfight value and anti-heal cuts it at the source
Avoid
- Spending your own escape before Pillow Toss is on cooldown.
Abilities to watch
- Naptime Ultimate
This is the ability that actually kills you — Layered: first a slow with reduced dash distance and a full lockout on movement abilities, then sleep, which is a hard disable. 2 AP adds +0.75s sleep duration and +3m radius. 1 AP removes 1 stamina on wake and stops stamina regeneration during sleep. Everything else in the kit is set up by it.
- It is a directional channelled gaze with a 19m radius — the counter is leaving the cone, not hiding, because it goes through walls
- Interrupt the channel: any stun, silence or knockdown on Rem stops it, and before 5 AP Rem has no damage resistance during the cast
- Once your team is asleep, apply exactly one damage instance above the ~100 threshold to wake a key teammate rather than letting the full duration run
- Pillow Toss Ability 1
This is the ability that actually kills you — Heavy knockback displacement on hit. The 2 AP upgrade adds -40% fire rate to those hit. Everything else in the kit is set up by it.
- It is a single-charge skillshot on a 25s (18s at 1 AP) cooldown — force it out with a feint approach, then commit for real
- A missed Pillow Toss is the entire engagement window on Rem; with 680 HP and no escape ability, that is the cue to dive
- Approach from an angle where knockback pushes you toward your own team rather than away from it
- Tag Along Ability 2
The core of Rem's game: it is simultaneously the only mobility tool, the main healing output, and a positioning trick that keeps Rem glued to a protected body instead of standing in the open.
- Any stun knocks Rem off the ally — stun ultimates and knockdowns are the designed answer, and they leave Rem exposed in the open with 680 HP
- Kill or force out the frontliner Rem is attached to; Tag Along requires a living ally in 23m and Rem has no other mobility
- Anti-heal items (Healbane, Decay and similar healing-reduction purchases) cut the missing-health burst directly and are the highest-value counter-item against Rem
- Lil Helpers Ability 3
Rem's macro engine and the reason Rem contributes to a game without contributing damage. Helpers convert map resources into souls and tempo while Rem stands in lane, and the buff mode is a quiet but real combat contribution.
- Watch the tunnels — Helpers stealing Sinner's Sacrifices is free enemy economy, and killing the Helper or contesting the sacrifice yourself denies it
- Helpers are killable; removing one costs Rem the ~15.1s rest cycle plus travel time
- A followed ally is the one Rem intends to keep alive — it is a free read on where Tag Along will go next
Abilities to bait — in this order
- 1. Pillow Toss
Pillow Toss first, always. It is one charge on a 25s (18s at 1 AP) cooldown, it is Rem's only self-peel, and landing it is also what refunds cooldowns on everything else. Feint an approach with a durable body, eat the pillow, then commit for real
- 2. Tag Along
Then Tag Along. A Rem who has already leapt to an ally cannot leap again for 40s (32s at 1 AP); forcing the hop by threatening that ally strands Rem where it lands
- 3. Naptime
Naptime is worth baiting only with a stun held in reserve — otherwise a forced cast still wins Rem the objective. At 2 charges it is also the one ability you cannot reliably drain
Matchup overview
- Their structural weakness: 680 HP with no escape ability that works without a nearby ally — the most fragile profile in this group Why this is shown: Rem's weaknesses. Strong evidence
- Their structural weakness: Anti-heal items shut down the majority of the kit's value directly Why this is shown: Rem's weaknesses. Strong evidence
- Their structural weakness: Contributes essentially no damage, so an enemy who survives the heal window is never punished Why this is shown: Rem's weaknesses. Strong evidence
What they do against you
- Naptime strips your dash distance and locks out every movement ability before the sleep even lands, so once you are in the 19m gaze there is no mechanical out — then your whole group is asleep for the objective Why this is shown: Authored from Rem's kit. Strong evidence
- Tag Along's 15%-of-missing-health burst plus lingering regeneration means the frontliner you just spent all cooldowns on is back to fighting health before your cooldowns return Why this is shown: Authored from Rem's kit. Strong evidence
- Pillow Toss knocks your diver clean off the target and, at 2 AP, applies -40% fire rate — your engage is displaced and your DPS is halved in one button Why this is shown: Authored from Rem's kit. Strong evidence
- Lil Helpers quietly take Sinner's Sacrifices out of your tunnels and collect crates across the map, so Rem's team out-economies yours without winning a fight Why this is shown: Authored from Rem's kit. Strong evidence
- Because Naptime pierces walls and floors, the usual 'break line of sight' answer to a large area ultimate does nothing here Why this is shown: Authored from Rem's kit. Strong evidence
How you counter them
- Buy healing reduction early (Healbane / Decay-style anti-heal). Tag Along's missing-health burst is Rem's entire teamfight value and anti-heal cuts it at the source Why this is shown: Authored counterplay against Rem. Strong evidence
- Hold a stun or knockdown for two specific moments: Rem attached via Tag Along (the stun knocks Rem off the ally) and Rem channelling Naptime (the stun cancels the ult outright) Why this is shown: Authored counterplay against Rem. Strong evidence
- Focus Rem directly — 680 HP with no escape means any gap-closer that gets past Pillow Toss kills before the heal cycle matters Why this is shown: Authored counterplay against Rem. Strong evidence
- Bring a hero with an unstoppable or knockback-immunity window; Pillow Toss is Rem's only self-peel and immunity walks through it Why this is shown: Authored counterplay against Rem. Strong evidence
- If your team is slept, deliberately apply one damage instance above the ~100 wake threshold to your most important teammate rather than letting the full duration run Why this is shown: Authored counterplay against Rem. Strong evidence
- Contest the crates and tunnel sacrifices on Rem's half of the map — killing Helpers costs Rem the ~15.1s rest cycle and denies the macro value the pick is built on Why this is shown: Authored counterplay against Rem. Strong evidence
- Rem does a lot of damage through summons rather than in person. Do not spend single-target cooldowns clearing them — area damage handles the summons while you keep your burst for the hero. Check whether the summons are what is actually killing you before you commit to fighting the hero at all. Why this is shown: Summoner kits split threat between hero and units. Strategic
Trading
- Any moment Pillow Toss is down — that is a 680 HP hero with no displacement and no way to stop a gap-closer for the next 18-25 seconds Why this is shown: Rem's vulnerability windows. Strong evidence
- Immediately after Tag Along is used, while the 40s (32s at 1 AP) cooldown runs and Rem is stuck on whichever ally was chosen Why this is shown: Rem's vulnerability windows. Strong evidence
- When Rem is out of 23m range of every living teammate: Tag Along has no valid target, so Rem has zero mobility Why this is shown: Rem's vulnerability windows. Strong evidence
- During the Naptime channel before the 5 AP damage-resist upgrade — Rem is stationary, telegraphed and takes full damage Why this is shown: Rem's vulnerability windows. Strong evidence
- After a Helper has been sent to follow a hero: it rests for ~15.1 seconds, so consecutive Helper plays are on a real timer Why this is shown: Rem's vulnerability windows. Strong evidence
- The first few minutes of lane before the 1 AP cooldown cuts, when both Pillow Toss (25s) and Tag Along (40s) are at base cooldowns Why this is shown: Rem's vulnerability windows. Strong evidence
- Rem builds almost no resist, which is the case where shred stops being a tank-buster and becomes raw amplification. Because shred is subtracted from total resist, a target sitting near zero goes negative — and negative resist is a damage multiplier, with −30% meaning they take 130%. Against a hero this fragile, one shred source in your build is doing the work of a damage item for the whole team's bullets, not just yours. Why this is shown: Shred subtracts from total resist and can push it negative; negative resist amplifies damage (−30% = 130% taken). Strong evidence
Laning
- What they want in lane: Tag Along's missing-health burst plus lingering regeneration makes a duo lane extremely hard to burst down, and the heal is strongest exactly at the moment the trade should have been lost Why this is shown: Rem's laning strengths. Strong evidence
- What they want in lane: Pillow Toss knockback denies the enemy's all-in and refunds cooldowns on hit, so a Rem who lands pillows out-tempos the lane Why this is shown: Rem's laning strengths. Strong evidence
- What you can take from them in lane: 680 max health, the lowest in this group and among the lowest in the game — Rem dies to any burst combo that connects Why this is shown: Rem's laning weaknesses. Strong evidence
- What you can take from them in lane: Zero damage contribution means a lane partner who wants to force kills gets no help doing it Why this is shown: Rem's laning weaknesses. Strong evidence
- Your lever: 930 base health is one of the largest pools in the game and makes them extremely hard to push out of lane. Why this is shown: Mo & Krill's laning strengths. Strong evidence
Mid game
- Their spike — ult unlock: Naptime turns Rem from a passive healer into the team's objective-taking tool — a wall-piercing mass mobility strip plus sleep is decisive at urn and mid-boss fights Why this is shown: Rem's power spike timeline. Strong evidence
- Their spike — 1 AP into Pillow Toss: -7s cooldown (25s to 18s) makes the peel-and-refund loop consistent rather than occasional Why this is shown: Rem's power spike timeline. Strong evidence
- Their spike — 2 AP into Naptime: +0.75s sleep and +3m radius (19m to 22m) is the difference between catching one hero and catching a group Why this is shown: Rem's power spike timeline. Strong evidence
- Their spike — 5 AP into Naptime (late 35min+): -65s cooldown plus +50% damage resist while channelling means Rem can cast it inside a live fight and have it back for the next objective Why this is shown: Rem's power spike timeline. Strong evidence
- Your spike — Scorn first two points (laning 0-10min): The Scorn/Scorn opener front-loads their strongest sustain and lets them snowball the lane (66.9% WR per deadlocklabs.gg). Why this is shown: Mo & Krill's power spike timeline. Strong evidence
- Your spike — Combo unlock: They gain the game's longest reliable single-target removal, plus the permanent max-health stacking mechanic starts. Why this is shown: Mo & Krill's power spike timeline. Strong evidence
- Your kit is built around lockdown and that is worth less on the Mid Boss than on Rem — it carries 35% Debuff Resist as of 03-06-2026, so your disables run roughly two-thirds as long on it. Plan the take around damage and positioning rather than a CC chain, and spend the chain on Rem if they contest. The payoff is worth the trip: 3,000 souls plus 50 per minute, two permanent buffs each, and a Rejuvenator crystal giving up to three single-use revives that return a player at full health after 3 seconds, for 3 minutes. Why this is shown: Mid Boss has 35% Debuff Resist (03-06-2026); reward is 3,000 souls +50/min, two buffs, and Rejuvenator revive credits. Verified
Teamfights
- Naptime is a channel, which means the fight is decided by whether you can break it. Hold one interrupt — a stun, a silence, or a displacement — specifically for that cast rather than spending it on the opening trade. If you have no interrupt, the answer is line of sight: leave the area entirely rather than trying to out-heal it. Why this is shown: Channelled ultimates are interruptible by hard CC, silence or displacement. Strong evidence
- Rem brings enough lockdown that stun sequencing matters. Community reporting describes stun diminishing returns of roughly 10% then 30% inside an 8-second window, applying to stuns only and not to silences, slows, disarms or hexes — so their follow-up chain may be shorter than the first one felt. Treat this as unconfirmed, but it is worth knowing before you burn a cleanse on the opening stun. Why this is shown: Stun diminishing returns reported by community sources; not confirmed in official notes. Uncertain
Positioning
- Rem decides where you stand, not you. The practical rule is to never hold a position whose failure case is being moved — stand so that being yanked or knocked puts you somewhere survivable rather than inside their whole team. Cover at your back is worth more than cover in front. Why this is shown: Displacement kits convert bad positioning into a kill; failure-case positioning mitigates it. Strong evidence
Build adjustments
- You deal spirit damage, so Healbane is the cheaper and more reliable anti-heal against Rem — it lands off your abilities at T2 rather than asking you to sustain gunfire you are not built for. Why this is shown: Spirit-applied anti-heal triggers on spirit damage; Healbane is T2 vs Toxic Bullets T3. Strong evidence
- Unstoppable (vitality T4) — Rem gives this team real channelled ultimates. Buy when enemy lockdown is the reason you lose fights — it lets you walk through a full CC chain and still deal damage. Why this is shown: Answers: enemy-channeled-ult, enemy-hard-cc, enemy-displacement. Verified
- Counterspell (vitality T3) — Rem gives this team real channelled ultimates. Buy against telegraphed single-target ultimates and hex-style point-and-click abilities you can read and parry. Why this is shown: Answers: enemy-channeled-ult, enemy-hard-cc. Verified
- Monster Rounds (weapon T1) — Rem gives this team real summons and turrets. Buy when you need to clear jungle camps and waves quickly, or to trade objectives with a pushing enemy. Why this is shown: Answers: enemy-summons, enemy-objective-pressure. Strong evidence
Common mistakes
- Anti-heal against Rem is bought correctly and applied at the wrong moment. Healbane's reduction runs for 8 seconds from your spirit damage and Toxic Bullets' runs while the bleed is up — both are windows, and re-applying the same source before it expires does not stack a second instance. The mistake is opening the fight clean and reaching for anti-heal once they start healing; by then you have spent the fight. Land it before they commit, then keep the window refreshed rather than re-triggering it. Why this is shown: Healbane applies for 8s on spirit damage; same-source healing reduction does not stack on re-application. Strong evidence
- Your instinct is to jump on Rem's backline the moment you see an opening, and the mistake is not checking what is above you. A Walker's Stomp is 350 damage plus 15% of your max health inside 15m with a 2-second stun on a 7-second cooldown — a 2-second stun handed to a team with peel is a death. Dive under their Walker only with Unstoppable pre-cast or after the Stomp has just gone off. Why this is shown: Walker Stomp: 350 + 15% max HP in 15m, 2s stun, 7s cooldown; hero diveThreat 3 into enemy peel 2+. Strong evidence
Analyse this against your whole enemy team
A single matchup only tells you part of the story — which enemy to actually focus, and what to buy, depends on the other five. Open the tool with this matchup pre-loaded and add the rest.
Open in the matchup toolOther Mo & Krill matchups
The other side
Want to know how Rem is supposed to play this?
Sources and method for this page
Rem's kit and counterplay were compiled from 7 sources, cross-checked for patch 09-16-2026. Threat ratings compare this pairing against Mo & Krill's own baseline win rate rather than a flat 50%, because ranking by raw win rate produces the wrong answer for heroes whose overall win rate is not 50%.
- https://deadlock.one/en/heroes/rem
- https://mobalytics.gg/deadlock/rem-guide
- https://deadlock.io/en/heroes/rem
- https://thegamehaus.com/deadlock/rem-deadlock-new-hero-ability-breakdown-and-gameplay/2026/01/26/
- https://gameriv.com/deadlocks-new-hero-rem-first-look-guide-and-abilities-explained/
- https://tracklock.gg/articles/deadlock-new-hero-rem